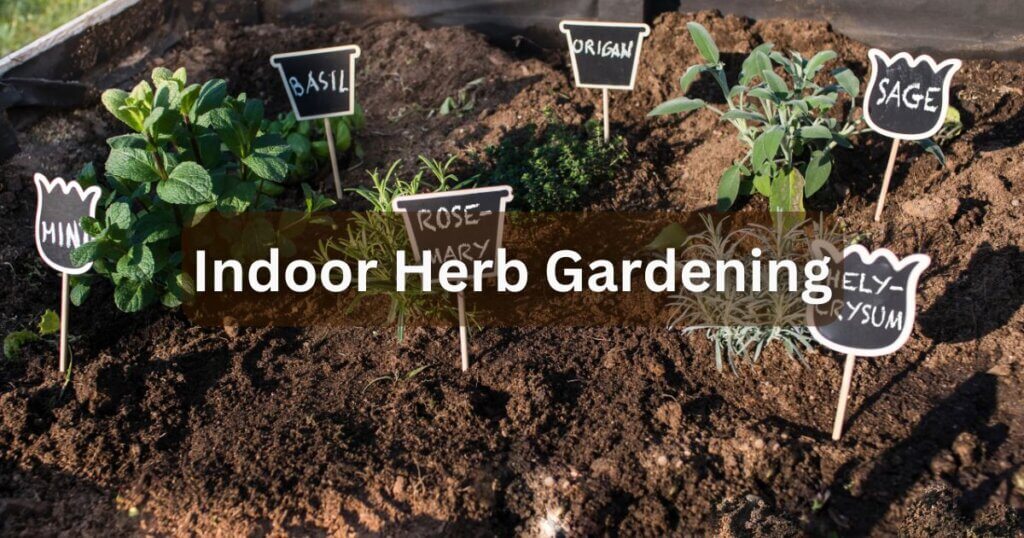
Indoor Herb Gardening 101
Some of the links in this post are affiliate links. As an Amazon Associate, we earn a referral fee from qualifying purchases—at no extra cost to you.
Unlock the Secrets to Thriving Herb Gardens Indoors
Are you a herb enthusiast yearning to bring the freshness of nature indoors? Do you dream of having a flourishing herb garden in your kitchen or living room? Look no further! In this comprehensive guide, we’ll walk you through the ins and outs of indoor herb gardening. We’ve got you covered, from selecting the perfect herbs to providing optimal growing conditions. Let’s dive in and discover the joys of nurturing herbs indoors.
Table of Contents
1. Introduction
Indoor herb gardening offers a convenient way to grow fresh herbs year-round, especially if you lack outdoor space. This guide helps you master everything from selecting herbs to optimizing indoor conditions. Whether you’re a beginner or a green-thumbed enthusiast, there’s something here for you. Let’s dive into the aromatic, flavorful world of indoor herbs.
2. Benefits of Indoor Herb Gardening
Indoor herbs provide fresh flavors and nutrients for cooking whenever needed. You can enjoy a year-round supply regardless of the season, right from your kitchen. They enhance your home’s aesthetic with greenery and fragrance. Plus, they create a calming, therapeutic atmosphere that can elevate your mood.
3. Selecting the Right Herbs
Choose herbs that match your light availability, space, and culinary needs. Popular options like basil, mint, thyme, and chives thrive well indoors. Consider their growth habits—some, like mint, can spread aggressively and need separate containers. Selecting herbs thoughtfully ensures a productive and manageable garden.
4. Choosing the Perfect Location
Pick a spot with at least 6 hours of indirect sunlight, like a south-facing window. Ensure consistent temperatures (60–70°F) and good air circulation. The area should be easy to access for daily care like watering and harvesting. Consider humidity—moderate levels are ideal for herb growth.
5. Essential Tools and Supplies
Equip yourself with pots (with drainage), quality potting mix, pruning shears, and plant labels. You’ll also need a watering can, fertilizer, a moisture probe, and possibly a grow light. Tools like a mister and gloves enhance care and comfort. Having the right supplies sets the stage for herb-growing success.
The VIVOSUN 3-Pack Gardening Hand Tools Set includes ergonomic tools like a trowel, transplanter, and pruning shears—perfect for potting, planting, and trimming your indoor herbs with ease.

6. Preparing the Soil for Success
Use well-draining potting mix tailored for herbs or vegetables. Enhance it with compost or organic material to boost nutrients and water retention. Fill containers with moistened mix and gently compact it without pressing too tightly. Proper soil prep promotes strong root systems and healthy plants.
7. Planting and Potting Techniques
Gently remove herbs from nursery pots and place them at the same soil level in new containers. Ensure the root ball sits just below the rim and fill gaps with soil. Water thoroughly after potting to settle roots and eliminate air pockets. Space plants properly to allow airflow and growth.
8. Watering and Moisture Control
Check your herb’s soil moisture by inserting your finger about an inch deep—if it feels dry, it’s time to water. Water thoroughly until excess drains from the bottom to fully hydrate the roots and prevent salt buildup, but avoid overwatering, as it can cause root rot. Herbs like thyme and oregano prefer slightly drier conditions, so let the soil dry out a bit between waterings and always use well-draining pots. To maintain humidity, mist occasionally or use a humidity tray, especially in dry environments, and watch for signs like wilting or yellowing to adjust care as needed.
With the XLUX Soil Moisture Meter, you can easily check your herbs’ soil moisture levels and avoid the most common mistake of indoor gardening—overwatering or underwatering.

9. Providing Adequate Light
Most herbs require a minimum of 6 hours of bright, indirect sunlight each day to thrive and develop strong flavors. If your home doesn’t provide enough natural light, use full-spectrum grow lights placed 6 to 12 inches above the plants to mimic sunlight. Rotate your herb containers every few days to ensure even exposure and prevent uneven or one-sided growth. If your herbs appear leggy, stretched, or pale, it’s a clear sign they’re not getting enough light and need better positioning or supplemental lighting.
If your herbs aren’t getting enough sunlight, the GE BR30 Full Spectrum LED Grow Light Bulb provides the full spectrum light they need to grow strong, green, and full of flavor—even in low-light homes.

10. Temperature and Humidity Considerations
Maintain temperatures between 60°F and 70°F and protect herbs from drafts or heat sources. Dry indoor air can harm herbs, so consider using a humidifier or pebble trays. Too much humidity can cause fungal issues—ensure good airflow. Adjust conditions if you see wilting, mold, or yellowing leaves.
Keep your indoor air herb-friendly with the LEVOIT Ultrasonic Humidifier, which adds much-needed moisture to dry environments—essential for preventing leaf curl and brown edges.

11. Fertilizing Your Indoor Herbs
Use a balanced organic fertilizer every 4–6 weeks during the growing season. Water before fertilizing to avoid root burn. Water-soluble plant food can supplement nutrition during regular watering. Watch for signs of nutrient deficiency and avoid overfeeding, which can harm herbs.
Feed your herbs the natural way with Organic Plant Magic, a liquid fertilizer made specifically for potted indoor plants to support lush, healthy, and safe-to-eat foliage.

12. Pruning and Harvesting Tips
Prune regularly to encourage bushy, vigorous growth and prevent legginess. Harvest in the morning for the best flavor and only take up to one-third of the plant at a time. Use clean scissors to snip above leaf nodes. Store fresh herbs in the fridge or preserve them by drying or freezing.
13. Dealing with Common Pests and Diseases
Watch for pests like aphids, whiteflies, and fungus gnats—control them with traps or insecticidal soap. Prevent root rot with proper drainage and avoid overwatering. Combat powdery mildew and leaf spot by improving airflow and using appropriate fungicides. Regular inspection keeps your herbs healthy and pest-free.
14. Troubleshooting Guide
Yellow leaves, wilting, or stunted growth often indicate water or nutrient issues. Check soil moisture, ensure proper drainage, and adjust light or temperature if needed. Treat pests early and remove infected plant parts to stop disease spread. A consistent care routine minimizes common problems.
15. Inspiring Herb Garden Designs
1. Vertical Herb Garden
A vertical herb garden is a smart and stylish solution for small spaces, allowing you to grow multiple herbs without taking up valuable floor space. You can mount planters on a wooden pallet, repurpose a shoe organizer, or use a tiered wall unit. This setup not only saves space but also turns your herb collection into a living piece of art. It’s perfect for kitchens, balconies, or any wall that gets enough sunlight.
Save space and add style with the Mkono Wall Hanging Planter, a minimalist vertical system that turns your herb garden into a living wall—perfect for tight kitchens or sunny apartment corners.

2. Herb Shelf or Ladder
An herb shelf or ladder adds a rustic and decorative touch while serving as a practical planting solution. Simply place pots on each step of an old ladder or line a bookshelf with herb containers. This vertical yet grounded setup keeps herbs organized and easy to access for cooking or garnishing. You can even label each pot for a neat, personalized finish.
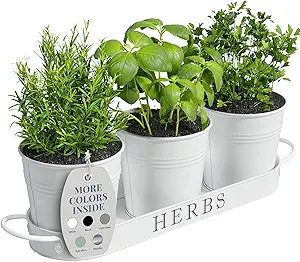
3. Windowsill Herb Garden
The windowsill is an ideal location for herbs that crave sunlight, like basil, thyme, or parsley. Line up small terracotta pots or use a sleek, elongated planter box to make the most of the space. Not only does it ensure herbs get plenty of natural light, but it also creates a fresh and fragrant view. This setup is especially practical for apartment dwellers and small-space gardeners.
Create a charming windowsill herb garden using the Barnyard Designs Herb Garden Planter Set, which comes with three labeled pots and a matching tray—ideal for basil, chives, parsley, and more.
4. Herb Spiral
An herb spiral is a creative and efficient design that offers different growing conditions in a compact, spiral-shaped bed. The top of the spiral tends to be drier and sunnier—great for Mediterranean herbs—while the bottom retains more moisture for plants like mint. Constructed with bricks, stones, or recycled materials, it adds architectural interest to your garden. Though traditionally outdoors, mini indoor versions can be created in deep planters or containers.
5. Hanging Herb Garden
A hanging herb garden brings a modern and airy look to your indoor greenery. You can suspend individual pots from a ceiling rod, use macramé hangers, or mount hooks in a window frame. It not only frees up counter and floor space but also makes a stylish statement in your home. This method works well for herbs that don’t need frequent harvesting or that thrive with good air circulation.
16. Conclusion
Congratulations! You’ve reached the end of our comprehensive guide to indoor herb gardening. Armed with the knowledge and tips provided, you’re now ready to embark on your herb gardening journey. Remember to select the right herbs, choose a suitable location, provide proper watering, lighting, temperature, and humidity care, and address any issues promptly. With patience, love, and attention, your indoor herb garden will thrive, providing you with abundant flavours, aromas, and natural beauty at your fingertips. Now it’s time to roll up your sleeves, dig in the soil, and enjoy nurturing your own indoor herb garden!
FAQs – Herb Gardening
1. How do I prevent my indoor herbs from becoming leggy?
If your herbs are stretching and becoming leggy, it’s likely a sign of insufficient light. Ensure they receive at least 6 hours of bright, indirect sunlight per day or consider supplementing with artificial grow lights to promote healthy, compact growth.
2. Can I grow herbs without direct sunlight?
While most herbs thrive in bright, indirect light, some, like mint and chives, can tolerate partial shade. If direct sunlight is not available, consider using artificial grow lights to meet their light requirements.
3. How do I repot my indoor herbs if they become root-bound?
If your herbs become root-bound (roots growing in tight circles at the bottom of the pot), gently remove the plant from its pot, trim any circling roots, and transfer it to a larger pot with fresh, well-draining soil. This will provide more space for the roots to grow and help the plant thrive.
4. What should I do if my indoor herbs are not growing well?
If your herbs are struggling, check for potential issues such as insufficient light, improper watering, or nutrient deficiencies. Adjust their care accordingly, such as providing more light, improving drainage, or fertilizing with a balanced organic fertilizer.
5. Are there any herbs that are particularly well-suited for beginners?
Yes! Some herbs are easier for beginners, including basil, mint, parsley, and chives. These herbs are hardy, grow well indoors, and don’t require highly specific care, making them great choices for novice gardeners.
Other Useful Resources Related To Herb Gardening
Basil
A versatile herb that adds flavor to various dishes. Purple varieties can also introduce vibrant colors to your indoor garden. Ensure it receives ample sunlight and space for optimal growth.

Oregano
This herb flourishes indoors and pairs well with tomatoes and peppers. It can also serve as a ground cover, providing humidity for pepper plants when allowed to spread.

Mint
Known for its refreshing aroma and flavor, mint can be grown indoors but should be contained to prevent it from overtaking other plants.
Parsley
A hardy herb that can withstand indoor conditions. It pairs well with asparagus, corn, and tomatoes.

Thyme
This herb is suitable for indoor cultivation and can deter pests like cabbage worms and aphids.
